Today the buzz word is UPCYCLING. Have you heard this word before? It's my new favourite word. Upcycling is taking things that would otherwise be destined to be thrown out and turning it into something else--something usable, something beautiful, something wonderful. Upcycling is taking plastic bags and making them into reusable bags, or taking an old pillowcase and making it into a dress for a little girl, or taking previously loved sheets and turning them into a rug. Seriously, the possibilities are endless with Upcycling! Whatever you can imagine, you can do.
Let's think about sweaters. Everyone has them. Everyone gets rid of sweaters for whatever reason (you grow out of them, they have a hole in the arm, they are out of style)...but really quite a few of them could be reused by unraveling them. If you take the time to unravel (or 'frog' as it's called in crocheting circles) a sweater and then crochet or knit it into something else then you are recycling (turning it into something else), reducing (saving a sweater from a landfill) and reusing (sweater into dishcloth or bag--it's even better when the new product can be used many times).
There are some wonderful websites that have tutorials on how to unravel sweater. This one is my favorite. Here is another one with good information. I gave them a thorough reading and then I just jumping into frogging my sweater.
The first thing you need to learn about frogging a sweater is... IT'S ALL ABOUT THE SEAMS. A good sweater has a double seam. A double seam indicates that the pieces have been sewn together whereas a sweater that has a single seam is one that has been serged. A serged sweater won't unravel. Well, it will but it will unravel into short pieces (the length of the sweater). When I am at second hand looking for sweaters to buy to unravel I am turning them inside out and seeing if I can spot the double seam - the good seam.
So, if the first thing is seams, the second thing to learn about frogging a sweater is this... IT'S IMPORTANT TO KNOW WHAT KIND OF MATERIAL YOUR POTENTIAL SWEATER IS MADE OUT OF. Some sweaters are really made out of several thin threads. You can still unravel them but it is a pain since one of the threads usually has some elasticity to it while the others don't. Cotton seems to be a good choice for unraveling. It doesn't fray and stays intact with no pilling.
The third thing I've found is that HOMEMADE SWEATERS ARE WAY EASIER TO UNRAVEL then a store bought one. The little seam is simple to spot. Everything unwinds easily. It's one piece of thread rather then the many little ones that store bought ones seem to have. There's no tags to deal with cutting out. It's just a nice time all around.
The fourth to keep in mind is this... DON'T BE AFRAID. Seriously. When it comes time to cut that little thread that is in the double seam. Just. Do. It. There is no fear in frogging.
Now, lets jump in...
I started with this sweater. It was a nice green. 100% cotton. It had a good double seam with a wonderful little thread and best of all it was $5.99 at Value Village. I washed it and when it was thoroughly dry I began the process.
First, I separated the good double seam and found the little thread. In the tutorial I posted the author says 'you have to love the little thread' & it's true. The little thread is your best friend in this process. Find the little thread and cut!
As you rip you get something like this...
Eventually, by following the tutorial, you'll have your sweater in pieces.
Now you can start the unraveling. This is the fun (and scary) part. The top of the sweater will have these little loops (like you get when you knit). You might have to cut some 'bad' top off... but be patient... stick with it and don't get frustrated. If it gets bad, just remind yourself that this sweater was free (or very cheap) and any amount of wool you get out of it is excellent.

I ended up with this much yarn from the sweater. I expect to have enough yarn there to do about a dozen crochet dishcloths.
And there you go. That's how you love your sweaters the frog way.
Carrie :)
P.S. I realize the pictures aren't the greatest... maybe I'll try to take better pictures of the next sweater I unravel and change them out.
Ms. Crafty says: Carrie is an avid crocheter and has launched her own business, 4Star, selling upcycled plarn bags...
April 7, 2008
Love Your Sweaters The Frog Way


March 12, 2008
Crocheted and felted clutch
Felt crafts of all types are all the rage right now. I’ve been crocheting and felting totes and clutches for several months now so thought I’d share this simple little project. If you can SC (single crochet), you can make this clutch in less than a few hours and for less than $5 (that’s WITH your 40% Michael's coupon).
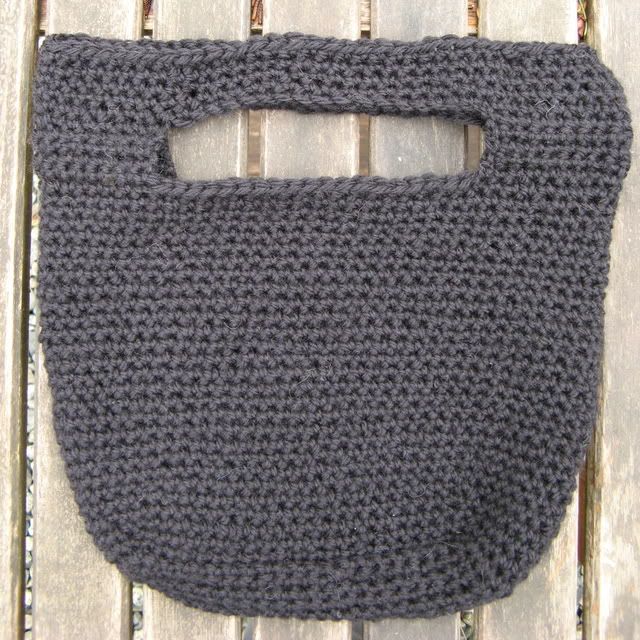
All it takes is one skein of wool and a size 6 hook. I use Patons Classic Merino Wool. You must use 100% wool or it won’t felt.
My inspiration for this clutch was a leather bag I drooled over in a magazine. Since I winged this one, there isn’t a true pattern. I just chained the length of the desired base, keeping in mind that felting will reduce the size by approximately 30%. SC several rows then SC in the round until it reached the height that I wanted. No adding or reducing required. The only tricky bit was leaving a gap for the handle. The nice thing about felting your crocheted pieces is that it’s very forgiving and you’re not going to notice any small errors.
Here comes the fun part. Throw your completed bag in the wash, preferably in a zippered pillowcase or lingerie bag. Toss in an old pair of jeans to help agitate and wash hot on the lowest water setting. After one cycle check it. It should feel thick and dense and there shouldn’t be any visible stitches. Different colours and types of wool shrink differently so you might want to pop it in again (it will shrink a little more).
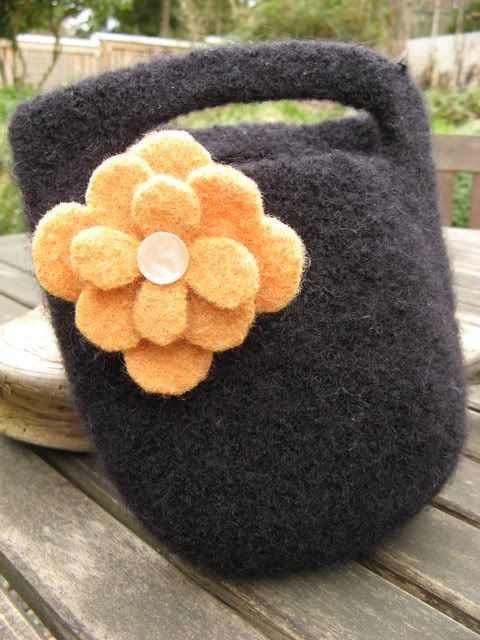
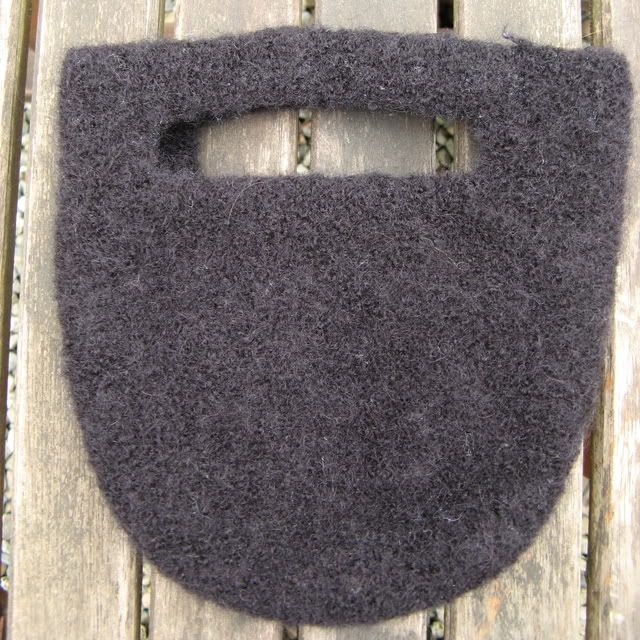
Once you have the desired look simply air dry and add some cute little embellishments (or not) and voila, you have the cutest little felted clutch bag in town!
Ms. Crafty says: kasanika is a second time guest blogger on MCIYN... you can view her Etsy store here...
February 17, 2008
Selling on Etsy...
Ms. Crafty says: i've asked some of the crafty ladies in my life to guest blog... first up are Spots and kasanika, who have tackled the world of Etsy, a hip online market place...


Etsy is "Your place to buy and sell all things handmade." It's sorta like a cross between eBay and a high-end craft fair. There truly is something for everyone.
Selling on Etsy is super easy and economical. All you need is an original art or craft you can ship, some good photographs, and a credit card. Etsy fees are currently in USD; it's 20 cents to list an item, plus 3.5% when you sell. Each item is listed until it sells, up to 4 months. Most buyers pay using PayPal, so having a PayPal account is a good idea.
The importance of taking good digital photos is crucial. An eye catching photograph draws people into your shop. It's also important to stagger your listings. Keyword searches bring up newest items first, it's ideal to always have one of your items at the top of the pile.
On the front page, the community button leads you into a wealth of information from policies and resources to workshops and chats. Be sure to visit the forums to get tips and tricks from others and to promote your own shop.
Feel free to stop by ours shops, say hi, and add us to your favourites too.
AngelaSpots
kasanika
Ms. Crafty says: as an aside, and a very happy customer, i wanted to mention that kasanika was recently featured in The Storque (Etsy's online zine)... you can read all about it here...
